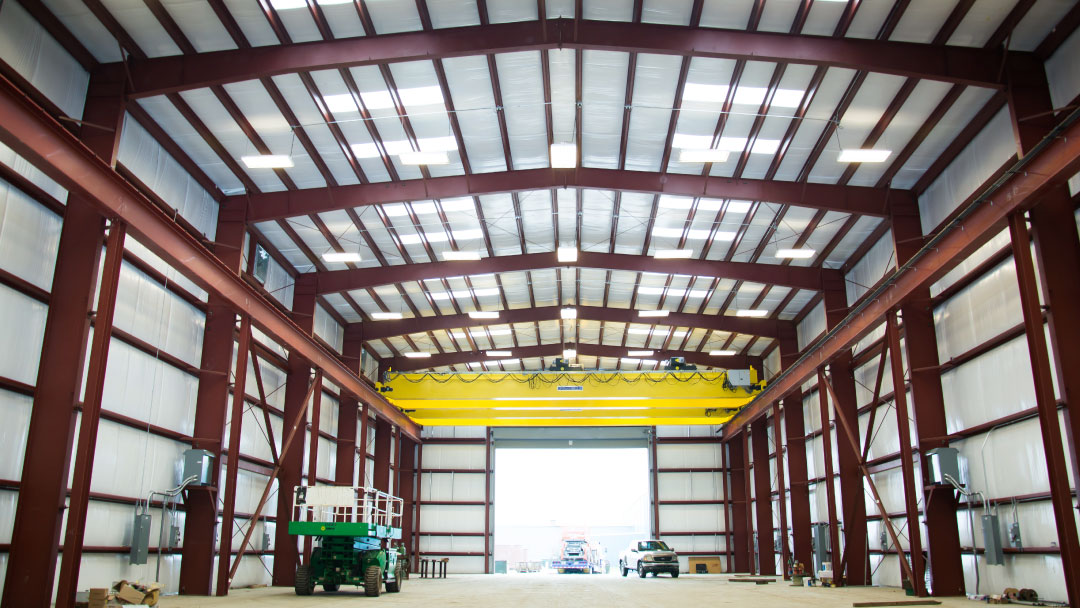
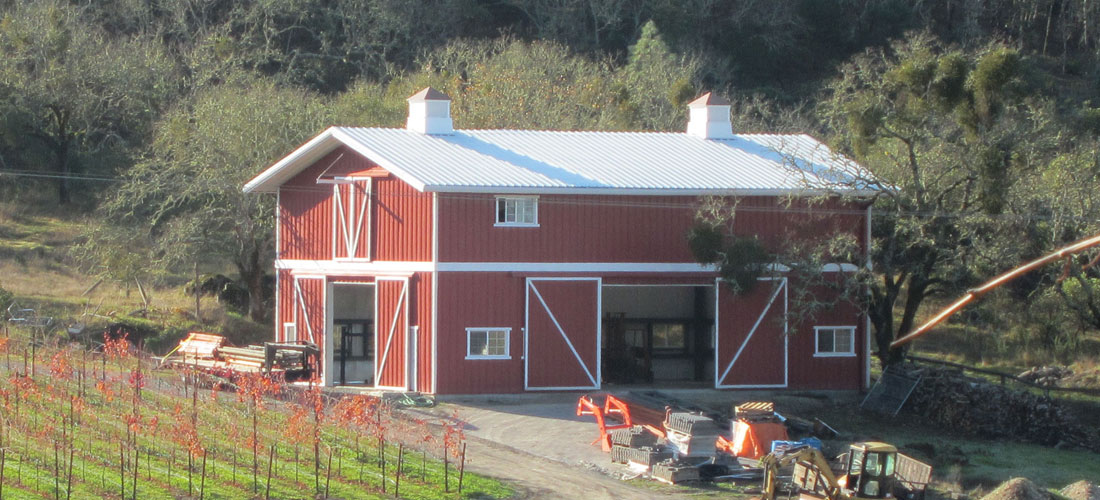
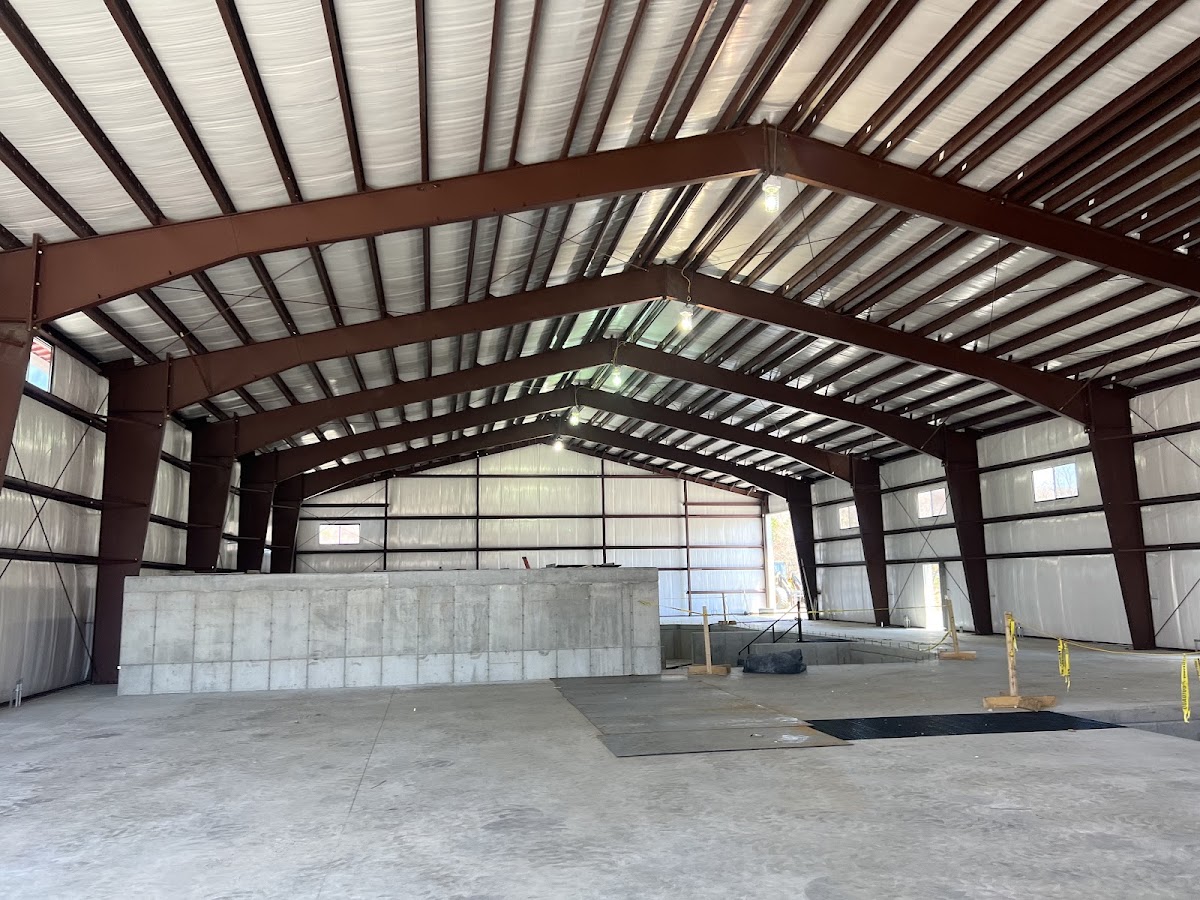



Barndominium energy efficiency begins with the conditioned boundary
Plan barndominium energy efficiency by defining the conditioned living space, tracing its air and thermal boundaries and coordinating moisture control, openings and mechanical systems for the actual climate. A metal shell is not a complete residential enclosure. The insulation product and HVAC equipment should follow the agreed design rather than substitute for it. Start with the spaces the household intends to heat, cool and occupy, including an explicit decision about the shop.
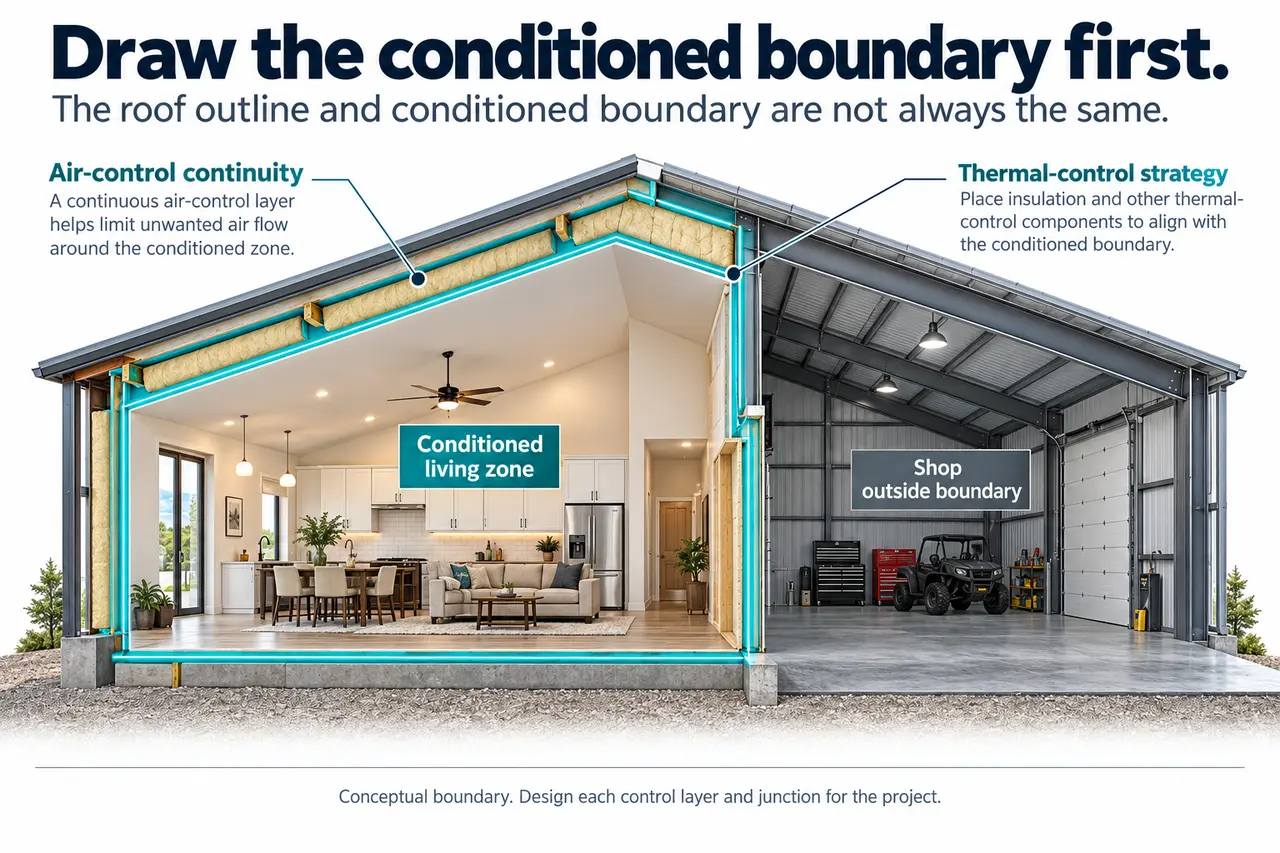
Mark the conditioned volume on both a floor plan and a section. If the living rooms occupy only part of the shell, the boundary may run along an interior dwelling/shop wall rather than the outer wall of the entire building. If an upper room sits above an unconditioned area, the floor also becomes an important interface. A gross building-area number does not explain those relationships to the designer.
DOE describes performance design as a whole-house systems approach involving site, climate, insulation, air sealing, openings and equipment. Apply that principle by giving the design team one shared description of the intended rooms, temperatures, occupancy and boundaries. The source supports coordination, not a claim that a particular steel home will achieve a certain bill or outperform another construction type.
Record the household operating assumptions as well. A shop used briefly on weekends may have a different schedule from living rooms occupied every day. Large doors may open frequently, or equipment may introduce a special ventilation question. Describe those facts without assigning a universal solution. The mechanical and enclosure designers can then assess the actual use instead of receiving only a request for an efficient barndominium.
Trace air, thermal, water and moisture control as distinct tasks
Use a boundary-tracing exercise before choosing products. Follow the living zone continuously from slab to wall, around openings, across the roof or ceiling and back down the other side. Ask where each control function continues through the junction. Air control limits unwanted air movement; thermal control addresses heat flow; rain and ground-water management address liquid water; moisture design also considers vapor movement and drying. One material may perform more than one function, but a product label does not prove the complete assembly works.
Request details for the places where the drawing changes direction or material. Roof-to-wall junctions, slab edges, window openings, large doors and service penetrations deserve explicit coordination. A continuous line in plan may be interrupted in section by framing or a service chase. Ask the designer to show how the intended layers connect and who installs each part. The purpose is to make the construction sequence understandable while the assemblies remain accessible.
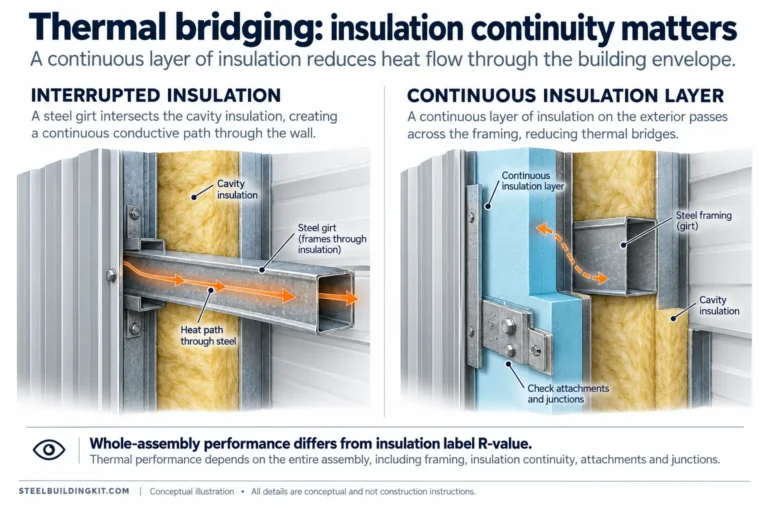
Distinguish the insulation rating of a product from the behavior of the assembled enclosure. Framing, attachments and interruptions can affect the thermal path. Ask what the design assumes about those features and what evidence supports any performance comparison. Do not compare two assemblies solely because their cavity insulation packages carry the same nominal number, and do not infer that the outer steel panel itself completes the thermal enclosure.
Keep water-management details in the same review. The owner should know how the design directs rain away, manages relevant ground moisture and accommodates expected movement and transitions. A new insulation choice can affect more than heat flow when it changes the assembly. Have substitutions reviewed against the intended functions rather than accepting an alternative based only on thickness or an advertised rating.
Address thermal bridges and climate-specific moisture questions
PNNL explains in its thermal-bridging guidance that framing or attachments crossing an enclosure can conduct heat past insulation. Its examples focus on mass and steel-framed multifamily buildings, so their details should not be copied as a single-family barndominium specification. The physical principle is useful: ask how the actual frame, cladding supports and junctions affect the proposed thermal-control strategy.
Ask the enclosure designer to distinguish an identified bridge from an assumed problem. Where does metal connect the two sides of the intended thermal layer? Which connections are necessary structurally, and how does the coordinated design address their effect? Do not remove a connection or add an improvised break without structural review. The objective is a complete assembly strategy, not a collection of individually plausible modifications.
For moisture control, provide the local climate, proposed assemblies and intended indoor operation. Ask where moisture could enter, where condensation might occur under the design conditions and how the assembly can dry. This guide does not prescribe one vapor-barrier position or one insulation system for every climate. A detail suited to one set of conditions should not be transferred automatically to another project because both have metal siding.
Resolve leaks and drainage issues rather than concealing them within new finishes. In a conversion or existing shell, condition evidence can change the enclosure approach. In new work, the installation sequence determines whether important transitions can be completed before they disappear behind other components. Ask which inspections or observations are needed before concealment and keep the relevant details available to the trades.
Treat an insulation substitution as a design change when it affects control functions, attachments or drying. Ask the responsible professional which parts of the analysis need updating. A lower-looking material price or a familiar trade preference does not establish equivalent assembly performance. Record the accepted change and its installation requirements so the mechanical designer and remaining trades are not working from the earlier enclosure assumptions.
Coordinate openings, daylight and solar exposure with room use
Place windows and doors according to the household program and the site, then evaluate their effect within the energy design. A wall with extensive glazing can offer daylight and views while changing heating and cooling needs. A large shop door can support equipment access while creating a different operating pattern from a residential entrance. Show the actual sizes, orientation and intended use rather than relying on a generic percentage of openings.
Ask the designer to compare plausible shading and glazing choices for the specific rooms and climate. A view window used in an occupied living area and a shop opening used for deliveries have different purposes. Keep the tradeoffs visible: daylight, privacy, solar exposure, household circulation and equipment access. The useful comparison concerns how the complete plan serves those needs, not a universal rule that more or fewer windows makes a better home.
Review installation interfaces along with product selection. The opening has to connect to the air, water and thermal strategies around it. Ask which details govern the sill, jambs, head and surrounding frame and who verifies them before finishes cover the work. A well-specified window does not establish the performance of an incomplete surrounding junction.
Record the operating assumptions used for large doors and intermittently occupied areas. If the shop door is expected to remain open during work, describe that condition to the designer. Do not expect the same equipment and control logic to deliver identical conditions with doors open and closed. Decide which comfort goals matter during each activity, and make those goals part of the project rather than a late complaint about equipment capacity.
Select HVAC from the coordinated design, not the shell dimensions
Give the mechanical designer the final intended enclosure, openings, conditioned areas and use schedule. Ask for the applicable load calculation and a distribution concept based on those inputs. Avoid selecting equipment from the exterior footprint alone or adding capacity simply because the building is tall. The correct design needs project information, and a change to the envelope or conditioned boundary can require an updated review.
Coordinate equipment location, distribution paths and maintenance access with the floor plan. A supply or return route should not be left to whichever corner remains after the rooms are finished. Ask where equipment can be serviced and replaced, how air reaches the intended rooms and which spaces remain outside that system. Keep the plan and section consistent so a clean-looking room drawing does not conceal unresolved duct or equipment space.
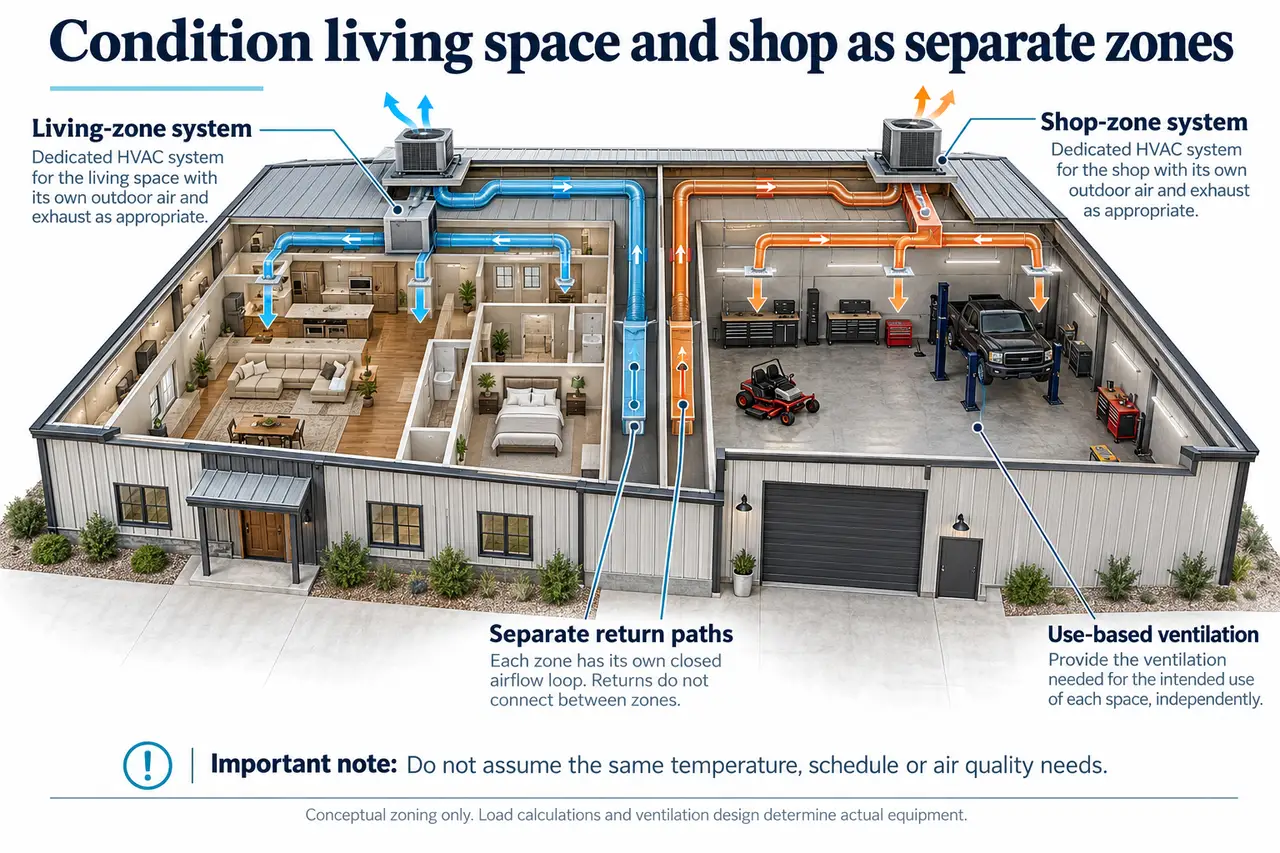
PNNL guidance on air sealing attached garages describes the importance of separating garage air from conditioned living space through a continuous boundary. For a combined home and shop, ask the mechanical designer how home supply, return, outdoor-air and exhaust paths remain appropriate to the actual uses. Do not assume that sharing a roof means the spaces should share a return-air path.
Ventilation and comfort conditioning are different questions. The living area needs its designed indoor-air strategy, while shop activities may create source-control or process requirements. Describe dust, fumes, engines, materials and occupant patterns accurately. A general fan or a familiar equipment package should not be assumed to address every exposure. The responsible designers should identify any specialist input needed for the intended activities.
Compare independent shop conditioning with leaving the shop outside the conditioned zone using the same activity description. If the owner wants a particular shop temperature only during occasional use, ask how that goal affects equipment, controls and the boundary. Do not attach a savings percentage to either option without a suitable project-specific analysis. The useful output is a system arrangement that matches the stated service, not a promise based on building style.
Worked example: 1500 conditioned square feet inside a 2400-square-foot shell
Consider a hypothetical 2,400-square-foot gross shell in which the owner intends to condition a 1,500-square-foot living allocation and leave the remaining shop outside that zone. These are illustrative allocations before detailed area measurement, not certified living area. The first design task is to draw the boundary around the actual residential rooms, including the shared shop wall and the corresponding ceiling or roof and slab interfaces.
The owner then asks whether conditioning the entire shell would be simpler. Compare two complete concepts rather than merely changing the equipment label. In the living-only concept, the internal boundary needs coordinated air and thermal control. In the separate-zone concept, the shop receives an explicitly designed level of conditioning and ventilation appropriate to its schedule and activities. Neither choice removes the need to keep the dwelling protected from inappropriate shop air transfer.
Track the consequences in a ledger: conditioned volume, common-boundary treatment, outside-wall and roof assemblies, opening assumptions, equipment scope, distribution, controls and verification. This reveals which work changes under each concept. It also prevents a larger conditioned area from being presented as an equivalent service at the same design assumptions. The hypothetical example deliberately provides no utility bill, equipment size or payback estimate.
Now add a future change: the owner expects to use the shop for a different activity. Ask which boundary, ventilation and equipment assumptions would need review. A spare electrical circuit or a larger equipment allowance does not establish that the future use is acceptable. Record the condition for reopening the design so the proposed expansion is not mistaken for work already evaluated and approved.
The decision rule is to compare complete services, not isolated products. If one concept provides more conditioned area or longer operating hours, acknowledge that difference before judging its equipment or energy implications. Ask the design team for an analysis with consistent inputs if the owner needs a quantitative comparison. Without that analysis, choose on the documented functional tradeoffs and retain the uncertainty honestly.
Specify verification and a useful handoff
Plan quality checks before construction reaches the relevant stage. Ask what observations, tests and documentation will verify the intended enclosure and mechanical work. Examples for professional discussion include inspection of accessible transitions, appropriate air-leakage testing and system commissioning or balancing where applicable. The designer and local requirements determine the actual method; this guide does not prescribe a universal test threshold or certify the finished building.
Use a deficiency list that identifies the exact location and intended correction. A general note that the building is insulated does not explain whether a missed transition has been repaired. Likewise, installed equipment is not proof that controls, distribution and ventilation operate as intended. Keep the acceptance questions tied to the design documents and obtain the appropriate evidence before the work is treated as complete.
Agree on a change-control record between the enclosure and mechanical teams. If a window selection changes, an additional room becomes conditioned or a shop schedule expands, identify whether the assumptions used for the system design are still valid. Date the accepted revision and communicate it to the installer. This is particularly useful when suppliers deliver different parts of the project under separate contracts, because a locally reasonable substitution can leave another team working from obsolete information. The owner should know which professional decides whether a recalculation or revised detail is necessary, rather than asking the installer to compensate informally by adjusting equipment or controls.
Retain the final assembly information, equipment instructions, control settings and maintenance requirements. Record which shop activities and operating schedules the design assumed. If the owner later changes the use, opens more of the shell to conditioning or replaces equipment, that record helps the next professional identify what needs another review. An accurate handoff is part of maintaining the intended performance rather than relying on a product warranty alone.
Is spray foam required for an efficient barndominium? This guide does not establish a universal product requirement. Ask the enclosure designer to compare complete suitable assemblies for the local conditions. Is a metal home inherently inefficient? The material label is insufficient to answer the actual design question. Evaluate the coordinated envelope and systems instead of treating a broad reputation as a performance measurement.
The metal building layout library can help communicate space and equipment relationships, while the steel building buyers guide helps organize project responsibilities. Before committing to equipment or an insulation package, barndominium energy efficiency planning should produce a traceable boundary, coordinated assemblies and a mechanical design based on the actual intended living and shop services.